Japan visa requirements and application for Filipinos: Travel guide
Learn more about Japan visa application and requirements, and find out if Japan is visa-free for Filipinos.




Planning a Japan trip from the Philippines? This sample 8-day Japan visa itinerary covers Tokyo, Kyoto, Nara and Osaka, with arrival in Tokyo and departure from Kansai International Airport.
Japan’s visa materials for Filipino applicants include a Travel Itinerary form with fields for the date, activity plan, contact and accommodation. Use this route as a planning reference, then enter your genuine details in the official form. Use this route as a planning reference, then enter your genuine dates, accommodation, contact details and activities in the official form.
Before applying, check the latest Japan visa requirements for Filipinos and Japan travel requirements.
We'll also introduce the Wise card, a handy travel companion to make seamless card payments when you're overseas.
| Table of Contents |
|---|


The schedule below follows the main fields in Japan’s official itinerary form. Replace the example days with your actual dates and make sure the information matches your flights, hotels and other application documents.
| Date | Activity plan | Contact | Accommodation |
|---|---|---|---|
| Day 1 — [Date] | Arrive in Tokyo, travel to the hotel and visit Shibuya | [Tokyo hotel phone number] | [Tokyo hotel name and address] |
| Day 2 — [Date] | Visit Asakusa, Ueno and Akihabara | [Tokyo hotel phone number] | [Tokyo hotel name and address] |
| Day 3 — [Date] | Visit Meiji Shrine, Harajuku and Shinjuku | [Tokyo hotel phone number] | [Tokyo hotel name and address] |
| Day 4 — [Date] | Travel by Shinkansen to Kyoto; visit central Kyoto and Gion | [Kyoto hotel phone number] | [Kyoto hotel name and address] |
| Day 5 — [Date] | Visit Fushimi Inari, Kiyomizu-dera and Higashiyama | [Kyoto hotel phone number] | [Kyoto hotel name and address] |
| Day 6 — [Date] | Visit Nara, then travel to Osaka and explore Dotonbori | [Osaka hotel phone number] | [Osaka hotel name and address] |
| Day 7 — [Date] | Visit Osaka Castle, Kuromon Market and Shinsaibashi | [Osaka hotel phone number] | [Osaka hotel name and address] |
| Day 8 — [Date] | Check out, travel to Kansai International Airport and depart Japan | [Airline or Osaka hotel contact] | — |
Replace every placeholder with your genuine information and use the official form required for your application. Check the current instructions if you are unsure which contact details to provide.
The sample uses an multi-city ticket route and three hotel bases, avoiding an additional journey from Osaka back to Tokyo before departure.
| Detail | Suggested plan |
|---|---|
| Duration | 8 days and 7 nights |
| Arrival airport | Narita or Haneda Airport |
| Departure airport | Kansai International Airport |
| Main destinations | Tokyo, Kyoto, Nara and Osaka |
| Local currency | Japanese yen (JPY) |
| Main transport | Trains, metro, buses and Shinkansen |
| Travel style | Active |
| Suggested bases | Ueno or Shinjuku; Kyoto Station or Kawaramachi; Namba or Umeda |
Eight days is enough for a fast-paced first trip: three nights in Tokyo, two in Kyoto and two in Osaka. Arrive by early afternoon, fly home from Osaka and stay near major stations where possible.
Ten days is more comfortable for families, slower mornings, theme parks or a return flight from Tokyo. To make this route easier, skip one Tokyo area or use Osaka as your only Kansai base.
Compare multi-city and return fares from Manila, Cebu or Clark. A multi-city ticket lets you arrive in Tokyo and leave from Osaka. If a Tokyo return looks cheaper, include the fare and time needed to travel back from Osaka. Consider adding a ninth day for that journey.
Check the baggage allowance before booking, especially if you’re planning to bring home plenty of pasalubong. Compare the total cost of a ticket with the cost of returning from Osaka to Tokyo.
Japan trip costs vary. JNTO's official budget guide lists these example starting prices:¹¹
| Example expense | Indicative price from JNTO | Approximate PHP |
|---|---|---|
| Budget hotel, single room | From about 6,000 JPY per night | From about 2,280 PHP |
| Mid-range hotel, double room | From about 10,000 JPY per night | From about 3,800 PHP per room |
| Local bus base fare | From 210 JPY | From about 80 PHP |
| Bowl of ramen | From about 650 JPY | From about 247 PHP |
These estimates use 1 JPY to about 0.38 PHP, checked 7 August 2026. Check the current JPY to PHP rate.
These prices aren't guaranteed. Check current flights, hotels and travel between cities, then add food, attractions, insurance, data, shopping and emergency funds.
Leave enough time for immigration, baggage collection, the trip into Tokyo and hotel check-in. Delays happen, so don't book a timed attraction after landing. Ueno is convenient from Narita, while Shinjuku is another well-connected base.
Visit Shibuya Crossing and the Hachiko statue, then browse nearby shops. Only book a timed observation deck if your arrival schedule allows it. Keep the evening light after your flight.
Start early at Senso-ji and walk through Kaminarimon Gate and Nakamise shopping street. Carry some yen, as smaller stalls and temple payments may be cash-only.
Head to Ueno Park, then choose a museum or Ameyoko shopping street to avoid rushing. Check museum opening days before you go.
End in Akihabara for electronics, games, anime, manga and collectables.⁹ Keep your baggage allowance in mind while shopping.
Begin at Meiji Shrine near Harajuku Station. Walk through the forested grounds and follow the posted worship and photography rules.
Explore Harajuku's fashion and character shops, then head to Omotesando or Yoyogi Park. Families can shorten this stop and take a midday break.
Have dinner in Shinjuku, check your Shinkansen booking and pack for Kyoto. Consider luggage forwarding if you have several suitcases.
Take the Tokaido Shinkansen from Tokyo or Shinagawa. The fastest services reach Kyoto in roughly two hours.⁵ Book ahead during busy periods and check oversized-luggage rules. Compare a Japan Rail Pass with individual fares before buying.
Leave your bags at the hotel, then explore Nishiki Market, Shijo and Kawaramachi. Check the opening hours of any must-visit shops or stalls.
Walk around Gion, then continue to Yasaka Shrine if time allows. Follow local signs, as some streets restrict access or photography.
Visit Fushimi Inari early. You don't need to finish the mountain trail to see the famous torii gates. Wear comfortable shoes and bring water.
Continue to Kiyomizu-dera, Sannenzaka and Ninenzaka. Allow for hills, crowds and queues, with time for nearby temples, shops and cafés.
Have dinner around Gion, Kawaramachi or Kyoto Station. For Arashiyama, swap out one of today's areas or add another night.
Store or forward your luggage, then take a JR or Kintetsu train. Kintetsu-Nara Station is closer to the park, but your best route depends on your hotel and ticket.⁶
Visit Nara Park and Todai-ji, adding Kofuku-ji if time allows. The deer are wild, so secure food and paper, watch young children and follow feeding guidance. Leave time to collect your bags and continue to Osaka.
Stay near Namba for food and shopping or Umeda for transport links. After checking in, visit Dotonbori and try takoyaki or okonomiyaki.
Start at Osaka Castle. Allow at least an hour for the museum, plus time for queues and the grounds.¹⁰ Check the latest opening hours.
Visit Kuromon Market, then continue to Shinsaibashi for snacks, skincare, stationery and pasalubong. Check airline limits before buying large boxes or liquids. Review declaration rules and Philippine customs guidance before buying food, cosmetics or supplements in bulk.¹²
Return to Dotonbori or explore Umeda. Keep your final evening easy, with enough time to pack and check your route to the airport.
Take a JR or Nankai train to Kansai International Airport. The trip from central Osaka can take around 30 to 60 minutes, depending on the service.⁷ Allow extra time for luggage, check-in and immigration. Complete or update eTravel within 72 hours before returning to the Philippines, and review customs requirements.³ ¹²
Yes. You can travel directly from Tokyo to Osaka and use it as your only Kansai base.
| Day | Base | Suggested plan |
|---|---|---|
| Day 1 | Tokyo | Arrival and Shibuya |
| Day 2 | Tokyo | Eastern Tokyo |
| Day 3 | Tokyo | Western Tokyo |
| Day 4 | Osaka | Shinkansen and Dotonbori |
| Day 5 | Osaka | Kyoto day trip |
| Day 6 | Osaka | Nara day trip |
| Day 7 | Osaka | Osaka sightseeing |
| Day 8 | — | Departure |
This means fewer hotel changes but more commuting. Kyoto offers quieter mornings and evenings, while Osaka may be simpler for families, older travellers or groups with several bags.
Use these practical tips to plan when to visit, prepare your visa and entry documents, get around and stay connected during your trip.
Spring and autumn usually have comfortable sightseeing weather. Cherry-blossom season is especially popular, while autumn brings cooler days and colourful leaves.⁸ Summer can be hot and humid. Golden Week and New Year can affect crowds and prices.
Read our guide to the best time to visit Japan from the Philippines.
Philippine passport holders generally need a tourist visa. Check the latest document checklist, application timing and validity rules before applying.¹ ²
The official requirements do not state one minimum amount of available funds for every applicant. Your financial documents should reasonably support your route, trip length and expected costs.
Complete the free Philippine eTravel registration within 72 hours before departure.³ You can also use Visit Japan Web to prepare for Japan’s immigration and customs procedures.⁴
Information checked on 7 August 2026.
Use trains and metro services in Tokyo and Osaka, and a mix of trains, buses and walking in Kyoto. An IC card covers many local trips, but Shinkansen journeys may need separate tickets. Families may prefer fewer stops, midday breaks and occasional taxis.
If your phone supports eSIMs and isn't network-locked, compare data, validity, coverage and hotspot rules. Download offline maps before changing cities.
See our guide to the best eSIMs for international travel.
Plan how you’ll pay and what you want to bring home, as payment options can vary between hotels, department stores, restaurants, markets and ticket machines.
Popular pasalubong includes snacks, matcha products, skincare, stationery, anime merchandise and crafts. Check expiry dates, baggage limits and Philippine customs rules before buying in bulk.
Read our complete guide to what to buy in Japan.
Cards work at many hotels, department stores and larger businesses. Carry some yen for smaller restaurants, stalls, temples and ticket machines. IC cards also cover transport and some purchases.
At a card terminal or ATM, you may be asked to pay in PHP or JPY. Choosing PHP uses dynamic currency conversion, or DCC. The merchant or ATM provider converts the yen amount into pesos using its exchange rate, which may include a markup or fee.¹³
Seeing the price in pesos may feel convenient, but it can cost more. To decline DCC, choose JPY, “local currency” or “without conversion”. Your card provider handles the conversion, but its usual fees may still apply. Check your card's terms before travelling.
Learn more about using cash or card in Japan.
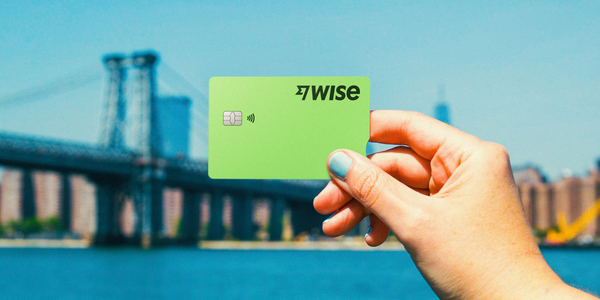
The Wise card lets you spend in 40+ currencies at the mid-market rate including USD, SGD, GBP, and JPY so you know you'll be getting a great deal in over 150+ countries. Simply create a free Wise account, order a card and top-up PHP to get started.
A physical Wise card can be ordered for a low fee of 369.60 PHP. Having a physical Wise card allows you to make chip and pin payments, as well as 2 free ATM withdrawals to the value of 12,000 PHP each month, before low fees start.
In supported countries, Wise also lets you pay with QR codes, giving you another easy way to pay when cards or cash aren't your first choice. That means you can use Wise for card payments, cash withdrawals, and QR payments, all from the same account.
While abroad, you can choose to spend directly in PHP and let auto-conversion do the trick, or convert to your desired currency with your Wise account. Either way, you’ll get the exchange rate you see on Google, with low, transparent fees from 0.57%.
Yes, if you're comfortable with a busy itinerary. Ten days gives you more time for slower mornings, theme parks or extra day trips.
Start with current prices for flights, seven hotel nights and travel between cities. Then add food, attractions, insurance, mobile data, shopping and an emergency fund. JNTO lists budget single rooms from about 6,000 JPY per night, although actual prices vary.¹¹
A multi-city, or open-jaw, ticket can save you from returning to Tokyo after Osaka. Compare the total cost, including baggage, airport transfers and a possible Shinkansen trip back to Tokyo.
Yes. It means fewer hotel changes, although you'll spend more time on trains. Staying in Kyoto gives you more time to enjoy the city during its quieter mornings and evenings.
Not necessarily. Add up the individual train fares in your final route and compare the total with the current pass price before buying one.
It can be. Remove a few stops from the busier days, plan midday breaks and consider using Osaka as your only Kansai base.
*Please see terms of use and product availability for your region or visit Wise fees and pricing for the most up to date pricing and fee information.
This publication is provided for general information purposes and does not constitute legal, tax or other professional advice from Wise Payments Limited or its subsidiaries and its affiliates, and it is not intended as a substitute for obtaining advice from a financial advisor or any other professional.
We make no representations, warranties or guarantees, whether expressed or implied, that the content in the publication is accurate, complete or up to date.

Learn more about Japan visa application and requirements, and find out if Japan is visa-free for Filipinos.

Planning to travel from the Philippines to Japan? Get the latest on travel requirements, including visa rules for Filipinos, flight information, and more.
Wondering what things to buy in Japan before going back to the Philippines? Find out what to buy including pasalubong, gifts, and more.
Wondering when the best time to visit Japan is? Learn more about weather, seasons and what to do throughout the year in Japan.